Total Pageviews

Saturday, December 24, 2011

Baklava for Christmas

For several years, George has been making Baklava for Christmas. When we were together he used to make Christmas cookies. Hundreds and hundreds of them. All different kinds. He would put them on Christmas plates, wrap them and deliver them to everyone. Everyone!!! Now he makes Baklava. This year, he asked me if I could help him. I was thrilled as I had never made this Armenian delight. I had, almost four decades ago, worked with phyllo dough making other Armenian dishes. But never baklava. So I did not hesitate when asked.

I have seen in recent years knock-offs of this treat, skimping on layers and reducing caloric content. I have always maintained a loathing for those. Do it right. Just eat less. Maintain tradition. For god's sake. When I asked George about his recipe I was thrilled to see that I was going to learn how to make the real thing!


We made four trays. Each tray had four layers of Fillo Dough. The bottom layer had four layers and the other three layers had three layers. Each layer was composed of four sheets of Fillo Dough. So each tray had 52 sheets of Fillo Dough.

The preparation of the nuts was two parts ground walnuts to one part ground almonds. These were ground in a tiny version of a Cuisinart.


To this we added 1/2 cup of sugar, 1/2 teaspoon of cinnamon, and 1/4 teaspoon of ground clove. I must admit that I cheated a little and added more of these spices than what he told me to put in. It just didn't seem like much.


Then we melted in the microwave a whole pound of butter for spreading on the layers of Fillo.


This is the brush I used for brushing. I think it was a three inch paint brush. It would have taken forever if I had used the standard home kitchen butter brush that is an inch wide. As George laid a sheet of dough down I brushed it. Then the next and the next.


First you start by buttering the pan. You see that we just used a cookie sheet. I had always thought that the pan was going to be a deep pan. I was able to bring from my own stash two restaurant half baking pans which are a bit bigger that home-grade pans. So we got a bit more out of those pans when it came time to cut.


George would lay the sheets and I would butter. Sometimes, the Fillo was easy to work with and sometimes not. It really had nothing to do with quality. The company that made what we were working with has been making this Fillo for over a hundred years and you will find it in the freezer departed as "Athens Fillo Dough". It is just that fragile. Working 4 trays meant that we handled over 200 sheets and there were bound to be some damaged ones. So don't be too frustrated if you find them. Remember that you have a whole pound of butter to work with. Melt two sticks at a time. Do the first two layers. Then melt the last two stick for the top two layers. It is easier to work if the butter is warm.


So then we spread the nuts on as evenly as possible, but not too much. It doesn't take much for the three layers. You just want a nice thin even layer.
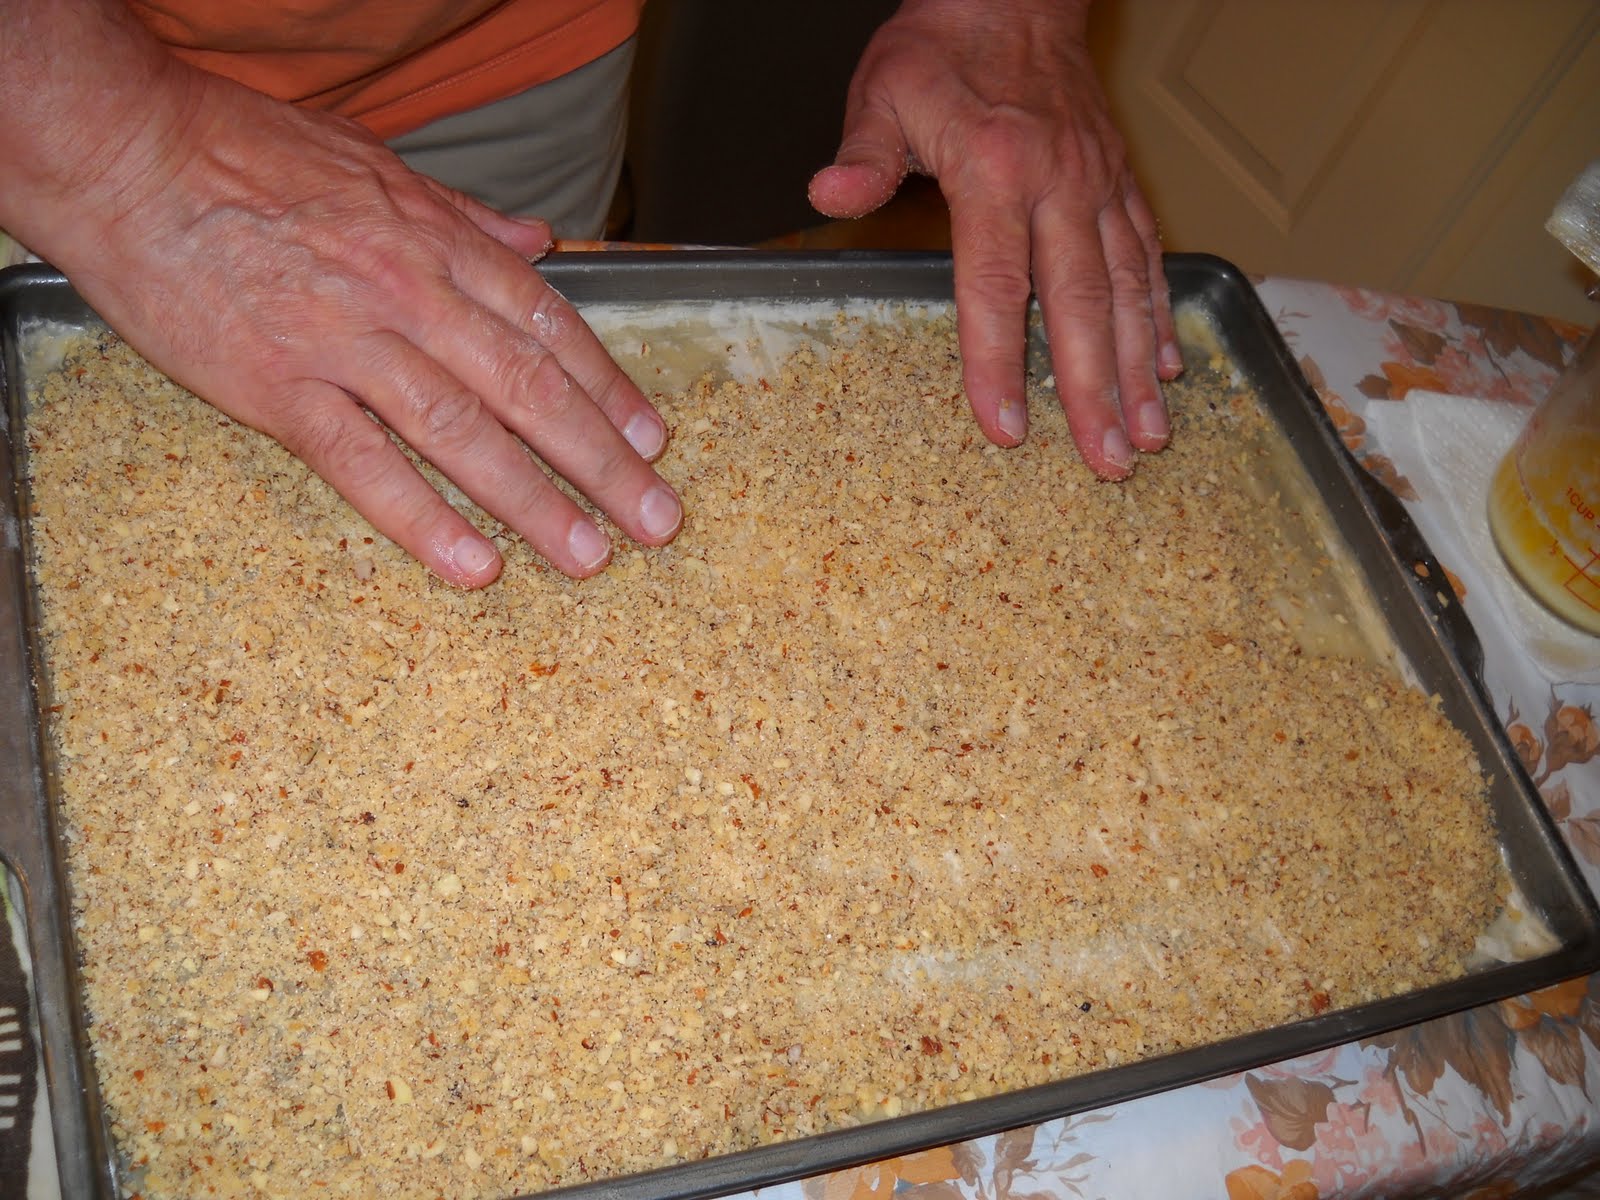


The hardest sheet of dough to butter is the first layers over the nuts. Just be generous with the butter and patient with your hand.


Before putting the tray in the oven, score the top layer of dough. My thoughtful sister Suzanne gave me this perfect knife sharpener for my birthday which I brought to George's kitchen when I saw the knife he was working with. It must have been a hundred years old and never sharpened. The sharpener is a Whustoff and does a really good job. After he sharpened his knife, cutting went really well.


So you put the tray in a 350 degree oven for about 1/2 hour until it is a nice light brown. If the pan is well buttered including and carefully done, the edges, then there will be no drying out. It is important not to dry out the edges.


We made one tray at a time and put each in the hallway to cool. While cooling, we made a syrup of 2 cups sugar, 1/2 cup honey, 2 cups water and a generous squirt of lemon juice. Cook this on the stove bringing to a boil and then simmering for a little while. You don't want to cook it down. You don't want it to get heavy. It should be a very light syrup. It must be hot when you pour it over the cold baklava. Then it takes time for the syrup to be absorbed into the pastry. You should not see any syrup around the edges of the pans. So let it sit for a day. Gooey is good.


It took us two days to make four trays. On the third day is when George began the process of cutting. I put each piece into a cupcake cup and then into tins. I think we filled nearly 25 to 30 tins.

It was exhausting but a wonderful experience. I will do it again next year. Now let's see. Who is on the list?????

Tuesday, December 20, 2011

Designer

I, like so many, am waiting for winter. It is not necessarily about the snow, although the snow is so important, It is also about the ice that collects from the edges of the roof tops and watching them sweat when the sun hits them. The light cloud of breath as I run to get my mail in the late night hours. I suspect this year there will be the children across the street throwing snowballs and building weird snowmen. It has been eight years since I have seen a live snowman. And then there is the silence that comes with the snow. I will open my window to hear it. Crisp, white and quiet.

I have missed the New England winters.


It is a few days till Christmas. My ornaments are designed and pretty much finished. I only have four left to make. Today I designed a wonderful apron for my niece. I can't load it up here as it's a present yet to be given. I still have a pin cushion to design and a kimono silk scarf. What I love about these presents is that I get to do everything from scratch - no patterns. Only now, unlike in the past, I am recording my patterns. People always say, "can you make me one?" but in the past I never recorded my patterns. I am learning. I am also discovering that I love designing.

Tuesday, November 29, 2011

Creamed Onions


I have never made creamed onions in my long history of cooking. And frankly, I don't even remember eating them. But I came across the idea on a cooking show, oh, sometime around two in the morning recently and I thought - "that might be nice!"

It is a dish our family has never had at any of our gatherings. It would be a treat, a surprise. My little sister Linda said I shouldn't make anything because I had just finished making curtains, chair pads, quilted place mats, 16 dinner napkins. She thought that that was enough. But who can go to a holiday dinner without food in hand?

So I bought three pounds of pearl onions, a huge bunch of dill, a quart of cream and off I was.

I put the onions in a large pot of boiling water for two minutes just to loosen the skins. With my knives very sharp, I began to remove the skins, cutting off the roots and trying to leave the thin tops on because they are so pretty that way. Half way through, the skins began to be difficult to remove, so I put them back in the hot water for another minute and that was enough to get the rest of the skins off. The onions are so lovely. You don't realize it until you are holding a handful of them and their translucence is so glistening.

I trimmed the thick stems from the dill and chopped it rather large. I wanted to be able to see the herb and to feel it on the tongue. There was a lot of dill. I used only half of it. I put the rest of it on a paper towel and placed that on a dish to dry out in the open. When you have fresh herbs that you can't use, chopping and drying them is really the best thing to do. I put them in small jars after they have dried at least a week. they have to be completely dry before storing. When I need them, it is almost like they were fresh from the market. I love that about fresh herbs. No waste. I put the dill to the side.

I then began the roux. I melted two tablespoons of butter and threw in three tablespoons of flour. This I cooked for a few minutes until the flour took on a bit of a nutty look. Then I began to whisk in the cream. Slowly. You have to do this slowly at first otherwise you will have a lumpy mess. Then keep adding cream until it thickens. Then add in a handful of dill. I had already turned the fire on under the empty onion pot so that it was hot but not burning. I then threw in the onions and the cream. I stirred it gently so as to not break the onions. I had to add a bit more cream. the roux keeps thickening as it cooks so you have to make adjustments. A very small amount of salt and a good twisting of pepper. I put it in the beautiful bowl and off to Linda's I was, Proud. This is going to be a winner.

When I walked in, I stopped dead in my tracks. My sister Suzanne had also made creamed onions. Oh I felt so bad. Here I was thinking it was going to be so great and it was a total disaster. Suzanne and Linda had discussed the menu and didn't tell me because they thought, because of all the work I put into the dining room, that I wouldn't bring anything. Even now, I am sitting here feeling so bad. I mean, who would have thought that two sisters would think the same thing on the same holiday!!!

Well, you have my recipe anyway, should you want to make them. Suzanne brought her onions home and we served mine. I never even got to taste hers. I still feel awful and that was four days ago!! I am going to burn in hell!!

I managed to bring home a container with maybe five onions left and some of the cream sauce. The picture you see is what I turned it into today. I took out a package of chicken sausage with sweet apples, cut them into small slices and sauteed them. In a large pot, I cooked up really quickly some fresh spinach that I roughly chopped for about one minute. I didn't want it to be too soft. I then boiled up the water and cooked some curly pasta. While that was cooking I made another roux and added some leftover cream and a bit of chicken stock and guess what? I had that leftover dill drying on the dish. I threw that into the new sauce. When the pasta was done I reserved some of the liquid, of course, then threw everything together. A week of dinners.

I used regular butter. I know. All the chefs use unsalted butter. But I don't use butter that often and unsalted butter has a short shelf life. So I use regular butter and taste before I salt. Oh and I love the fresh cracked pepper. I don't understand how a chef can spin the cracked pepper three or four times in a huge dish and think it will flavor the dish? If I am making a huge dish that fills my biggest casserole, four cranks of the pepper mill don't do it for me. Or do I have the wrong pepper mill? Do the chefs have special pepper mills that I don't know about? When I was cooking in a professional kitchen, Chef Clayton really used his mill. I could see the pepper. It was beautiful.

I love cooking. It just makes me feel whole.

Tuesday, November 8, 2011

Flowers everywhere

This is the dress that took me I cannot begin to count the hours. I have recorded hours, but the application of flowers was actually a vision. I think anyone who wants to be a dress maker should attempt a beauty like this. When you are through, the smile on your face is deep.

THE PROCESS


When I unpacked the box and laid out the fabrics my first reaction was that this tulle was so stiff. I was sent these notes explaining the ideas for the dress. There are two layers to the skirt. Should this be an inner interfacing to the lower layer or could it be a part of both layers? Was it too stiff? Would it look like a costume or a party dress. I am always worried about the carnival-costume look.


The more I touched it, the more skeptical I was that it would work. It kept crying to me "What are they thinking?"

But as a single layer, it didn't seems so bad. So I began. All the outer layers of the dress had come already cut and the pattern pieces attached. So I laid out the skirt pieces, ironed the paper patterns, and worked on placing them onto this tulle so that it would lay properly inside each skirt. My experience has been that if it is not cut correctly, it could twist and send the garment in a different direction than it should be going.

So I cut and then stitched each piece to the lower lining or the skirt. Then sewing the three layers together was easier. The problem was, once right side out, it was necessary to stitch on the lining side close to the seam. A stay stitch. I clipped the seam of course. But the stay stitching was not coming out well. I was constantly tearing it out and re-stitching. So, I used a technique that I have used for decades on small curves. I took my pinking shears and pinked close to the seam. Of course, I should have done this in the first place, but my thinking was that it is such a gradual curve, perhaps it did not require the pinking. You have to be very careful when pinking


This is the seam trimmed.


Then it is pinked close leaving 3/16th of an inch to the seamThen you turn the skirt right side out and understitch. I am using white thread to show it up. It comes out very smooth, and there is no undoing of stitching to straighten out any folds.

This then is the outside of the skirt, very smooth, a beautiful curve.

Then the question was, do I repeat this for the upper skirt? So I worked the concept on scraps of the fabric. First putting the stiff tulle only into the lower layer, then making another with tulle in both layers. If it were possible, I would have tried this to the actual skirts, but once the seams are trimmed, change is just about impossible. The first sample with the tulle only in the lower layer felt rather lifeless. Almost the whole effect of the tulle was lost. But in the second sample, with the tulle in both layers, there was a wonderful lightness. If I were wearing this, I would be in the mood for a great wine and dancing. So, I went for the two layers. And just look at the dress. You can see it. The dress breathes.


The bra cups to the boustier were already made and in pieces. Make a decision. Frankly, when I placed the red which covered the black taffeta, the basic fabric of the dress, underneath the flower tulle, the red looked like a costume again. It did absolutely nothing for the bodice. I did talk to Julie at Fabric Depot, for whom I am making this dress, and she said to trust my instincts.
So I re-cut the bra pieces. I would have had to do this anyway to stitch in the flower tulle.


I love this insulation. It is a knit-covered foam. Where has it been all of my life! I have taken apart so many purchased bra cups and shoulder pads to build a bust in garments. This fabric, and I promise to find out what it is, just molds itself to whatever you want it to. I installed this cup liner at the very end of constructing the bodice. It needed to be cut down and hand stitched into the bra. The whole bodice was originally meant to be boned so that the boning stitching would show on the outside. But with this flowered tulle, that would not be possible. So I completely boned the lining which was made of the same taffeta as the dress itself. Before closing up the dress is when I stitched in my hand made cups. I have to find out what this fabric is so I can order some to have in my stock.


These are some of the markers I used in the next step. When it comes to marking soft tulle, not just anything works. Do you see the grey one? At the very end of marking and cutting the bodice and yoke pieces, is when I dug that one up and it worked the best. I need to get that style in all the colors. It is put out by Clover, a company from Japan that excels in notions.


Then I spent a week pulling out the stiff pages in magazines to use them for the placement of each pattern piece onto the flowered tulle, marking and cutting. A very lengthy process, But this is exactly the type of thing I love to do. Fussy cutting.


I put the flower tulle flowers to the board so that I could mark the tulle. I had to make sure that each piece was mirror cut, all the markings included. Then I used very fine scissors also from Clover, and carefully cut each piece. Then all the flowers had to be removed from the seams for stitching. The markers did have a tendency to distort the tulle while dragging it alongside the magazine pattern pieces. But I cut them anyway and fit them onto the taffeta when it came to that step.


This is a lot of flowers. I did have some left over. My first attempt was in matching the lines of the flowers. The original flowers are stitched on in rows. You can see it here. And I love matching stripes, plaids, patterns. So, that is what I did. And it was awful. I wish I had taken a picture. You would have laughed. So, again, here I am, taking - carefully - taking the pieces of the bodice apart and re-cutting the flowers so that they are random all in trying to maintain the grain of the fabric. Again, cutting off flowers to be re-positioned.

First I stitched the bodice and hand-stitched the flowers so that it looked like a field of flowers rather than a flower pot here and a flower pot there. Then the yoke was constructed and attached to the bodice. Sitting, arranging, re-arranging. It is lovely work.

The final part was attaching the skirts. They didn't really marry well. I think it was either a flaw in the pattern or there was no instruction on how to reduce the difficulty matching the yoke to the skirts. More arranging of flowers. I love that the straps are adjustable. Then the lining was all hand stitched from the top of the zipper across the skirt seam and around. So the whole dress is completely enclosed. I just love that. Most of the time, I will put in a lining if a pattern comes unlined. To me, to put in so much work and not have it lined is atrocious. It is amazing how many patterns today are unlined. This dress is worth all the time it took to make it.


Tuesday, November 1, 2011

October snow storm


When the snow first began I was at my sister Linda's house. I ran out to see if I could catch the first few flakes of snow. I thought it would not last. After all, this is only October. It would be cool to catch snow flakes in October. I was positive that nothing would come of it.

The air was white. You can see it here. This always happens before a snow. The air changes color.


Here you can see a few flakes on the left.


A little while later, it was getting a bit denser


It might look like rain but it is just that the snow is heavy. Very wet. It is beginning to come down very hard.

OK. This is turning into real snow. Now you can really see that this is a snow storm. I think it might become more that a dusting.

I love this picture. This is a well ingrained memory from growing up. The clothes line. Even in winter the laundry was hung out there. The sheets and jeans were frozen stiff. Careful not to bend them or else....

This makes me feel quite peaceful. I can look at this forever. ~~~~ I just have.


OK. People have lost power, television, internet, heat, everything. It became a mess. It is a record affair going on here. A record storm since 1908, I heard on the news, in this state. 200,000 people without power. For some, it will take a week to restore them.

I myself? I am on the CMC Hospital grid and we are a little special here according to George. Things here have to be the last to go. The hospital is huge and major. Can't break down. I don't have heat yet, but that has nothing to do with the snow. I didn't know my heat is gas. Last week, I spoke with the landlord because I couldn't figure out how to turn on the heat and he asked me if I had called the gas company. I hadn't because I didn't know it was a gas situation. Nothing on the lease indicated it. I had to remind myself that it was out of my control. Just make the call.

So, I called them and an appointment was made to get it turned on this coming Friday. And then this cold spell hits with the snow? I am living with sweaters, leggings, socks, and my winter coat on the bed at night. It works. And I actually get hot in here with all this stuff. The days are beautiful. I even opened the windows today. How I love this time of year.

Tupperware


Is this not the most beautiful pot? I don't own much tupperware. This is how I store my food in the fridge. Food just does not spoil in it.


This is the larger one. I am fortunate to have been able to get two. I can't tell you when we got them. George and I spent so much time traveling the countryside visiting are shops looking for pieces like this. I was very particular. I don't like thick pottery. Despite how they look, these pieces are very light.


Here are the two of them together. They make my pathetic kitchen look wonderful.